Markdown Syntax
This section briefly introduces syntax that will help you write documentation on this website. Note that the documentation is written in an extended version of Markdown, so most of the time you don't need special syntax besides the basic Markdown syntax.
Code blocks
This website supports inserting code blocks with highlighted lines. For example, the following snippet:
```python {1-2,4,6} title=snippet.py
@ti.kernel
def paint(t: float):
    for i, j in pixels:  # Parallelized over all pixels
        c = ti.Vector([-0.8, ti.cos(t) * 0.2])
        z = ti.Vector([i / n - 1, j / n - 0.5]) * 2
        iterations = 0
        while z.norm() < 20 and iterations < 50:
            z = complex_sqr(z) + c
            iterations += 1
        pixels[i, j] = 1 - iterations * 0.02
```
will result in a code block like:
@ti.kernel
def paint(t: float):
    for i, j in pixels:  # Parallelized over all pixels
        c = ti.Vector([-0.8, ti.cos(t) * 0.2])
        z = ti.Vector([i / n - 1, j / n - 0.5]) * 2
        iterations = 0
        while z.norm() < 20 and iterations < 50:
            z = complex_sqr(z) + c
            iterations += 1
        pixels[i, j] = 1 - iterations * 0.02
Tables
| Some Table Col 1 | Some Table Col 2 |
| :--------------: | :--------------: |
|       Val1       |       Val4       |
|       Val2       |       Val5       |
|       Val3       |       Val6       |
| Some Table Col 1 | Some Table Col 2 |
|---|---|
| Val1 | Val4 |
| Val2 | Val5 |
| Val3 | Val6 |
TIP
Tables Generator is a great tool for generating and re-formatting Markdown tables.
Cross-references
To link to another section within the same article, you would use [Return to ## 1. Code blocks](#1-code-blocks): Return to ## 1. Code blocks.
We follow the best practices suggested by Docusaurus to cross-reference other documents, so to link to sections in other articles, please use the following relative-path based syntax, which is docs-versioning and IDE/GitHub friendly:
Return to [Contribution guidelines](/docs/contributor_guide): Return to Contribution guidelines
Centered text blocks
To make a text or image block centered, use:
<center>

Centered Text Block!

</center>
Centered Text Block!
NOTE
You HAVE TO insert blank lines to make them work:
<center>

</center>
Text with color backgrounds
You could use the following to highlight your text:
<span id="inline-blue"> Text with a blue background </span>,
<span id="inline-purple"> Text with a purple background </span>,
<span id="inline-yellow"> Text with a yellow background </span>,
<span id="inline-green"> Text with a green background </span>
Custom containers
As you already saw in this guide several times, you could add custom containers:
:::tip
This is a tip without a title!
:::
tip
This is a tip without a title!
:::tip TITLE
This is a tip with a title!
:::
TITLE
This is a tip with a title!
:::note
This is a note!
:::
note
This is a note!
:::caution WARNING
This is a warning!
:::
WARNING
This is a warning!
:::danger DANGER
This is a danger!
:::
DANGER
This is a danger!
Code groups
You could also insert tab-based code groups:
import Tabs from '@theme/Tabs';
import TabItem from '@theme/TabItem';

<Tabs
  defaultValue="apple"
  values={[
    {label: 'Apple', value: 'apple'},
    {label: 'Orange', value: 'orange'},
    {label: 'Banana', value: 'banana'},
  ]}>
  <TabItem value="apple">This is an apple 🍎.</TabItem>
  <TabItem value="orange">This is an orange 🍊.</TabItem>
  <TabItem value="banana">This is a banana 🍌.</TabItem>
</Tabs>
- Apple
- Orange
- Banana
To add footnotes, use:
This sentence[^1] has two footnotes[^2]. (See the footnotes at the bottom of this guide.)

[^1]: I'm a footnote!
[^2]: I'm also a footnote!
which results in:
This sentence1 has two footnotes2. (See the footnotes at the bottom of this guide.)
Images
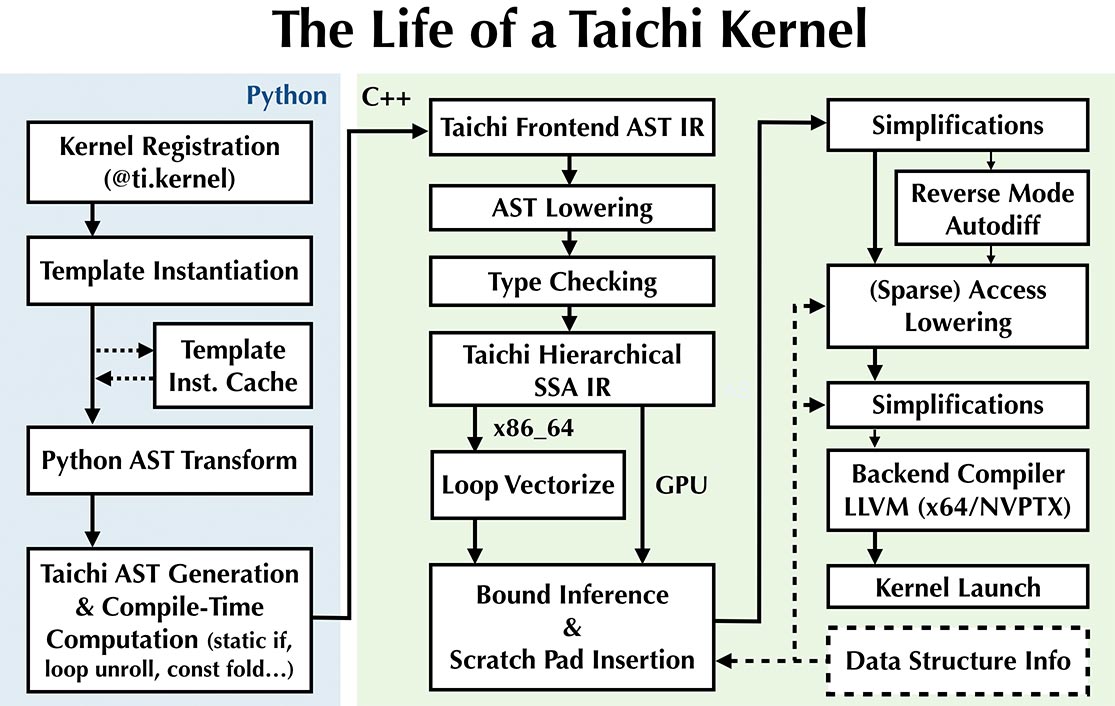
Inserting images is as straight-forward as using the ordinary Markdown syntax:


In-line Table of Contents (ToC)
You could use:
import TOCInline from '@theme/TOCInline';

<TOCInline toc={toc} />
to insert an in-line ToC: